Commercial Cleaning Winnipeg: Solutions for a Spick-and-span Office
Wiki Article
Deck Staining Made Easy: Step-by-Step Overview for DIY Enthusiasts
Are you a Do it yourself fanatic looking to give your deck a fresh brand-new appearance? In this detailed guide, we will certainly stroll you via the process of deck staining. With our easy-to-follow guidelines, you'll be able to change your deck into a stunning outside room in no time.
Preparing the Deck Surface
Before you begin tarnishing the deck, make sure you're appropriately cleaning up and also fining sand the surface area. Utilize a power washer or a pipe with a high-pressure nozzle to completely cleanse the deck. Pay close interest to locations with stubborn discolorations or mold and mildew, as well as make use of a deck cleaner or a mixture of warm water and light detergent to treat them.
As soon as the deck is completely dry, it's time to sand the surface. Get a handheld orbital sander or a fining sand block, and also start fining sand the deck boards in the direction of the wood grain.
Choosing the Right Discoloration
When selecting the suitable stain, you'll intend to take into consideration the sort of wood you're collaborating with. Various kinds of wood have various qualities that can influence just how well they take in the tarnish. Softwoods, like yearn or cedar, often tend to take in stain even more readily than hardwoods, such as oak or mahogany. Maintain this in mind when choosing your discolor to ensure you accomplish the wanted coating.
Stains come in a selection of shades, from light to dark, and also can drastically alter the appearance of your deck. If you're looking to enhance the all-natural shade of the wood, select a transparent or semi-transparent discolor.
Lastly, think regarding the level of defense you desire for your deck. Discolorations with higher degrees of pigment have a tendency to provide much better defense against UV rays and also moisture. If your deck is subjected to rough weather problems, it's worth investing in a tarnish with included protective high qualities.
Cleansing and also Repairing the Deck
Mccoys Pressure Washing And Deck Staining
To cleanse and also repair your deck, you'll require to collect the essential tools and also products. First, order a broom or leaf blower to remove any kind of loose particles such as leaves, dirt, and also branches. Next, inspect the deck for any kind of damaged or rotten boards. If you identify any kind of, make sure to have substitute boards handy, together with a round saw as well as a power drill for the repair work. In addition, you'll need a deck cleaner service, a scrub brush, as well as a stress washing machine to remove dirt, mildew, and spots. Don't fail to remember to put on protective eyewear, handwear office cleaning services Winnipeg covers, as well as clothing while functioning. When you have everything all set, start by sweeping the deck extensively, taking notice of the corners and edges. Then, blend the deck cleaner solution based on the maker's instructions as well as use it kindly to the surface. Make use of the scrub brush to upset the service and also loosen any kind of crud. After letting it sit for a couple of mins, wash the deck with a stress washer, operating in a sweeping motion. Be mindful not to apply way too much pressure as it could harm the timber. Ultimately, allow the deck to completely dry completely before going on to the following action.
Using the Discoloration
Mccoys Fence Staining
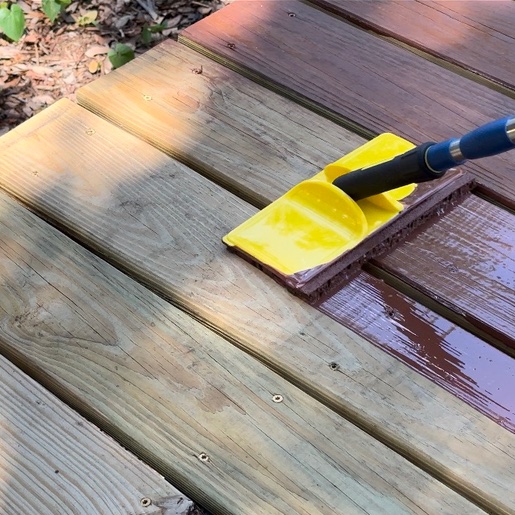
Since you've finished cleansing and repairing, it's time to apply the tarnish to your deck. This is the amazing part where you obtain to see your effort revived. Start by picking the best stain for your deck. Think about the shade and sort of wood you have. Make certain to check out the directions on the stain can to ensure you apply it properly. Prior to you start, shield nearby plants and surfaces from any kind of prospective drips or spills by utilizing a ground cloth or plastic bed linen. Currently, get hold of a paintbrush or roller, and also begin using the tarnish in smooth, even strokes. Operate in little areas, complying with the grain of the wood. Don't fail to remember to discolor the sides as well as edges of your deck. As you go, ensure to remove any type of excess discolor to stay clear of a blotchy coating. Permit the first layer to dry totally prior to using a 2nd layer if preferred. Once you're done, allow the stain treatment according to the manufacturer's instructions prior to relocating any furniture or plants back onto your lovely, recently discolored deck.
Ending Up Touches and Maintenance Tips
After applying the final layer of stain, it's important to frequently clean as well as seal your deck to maintain its beauty and also safeguard it from the aspects. Choose a top quality sealant that is especially created for decks and use it according to the producer's instructions. It's recommended to use a new coat of sealant every 1-2 years to keep your deck looking its ideal.
Final Thought
Fence Staining Near Me
In conclusion, you have found out exactly how to make deck staining an easy job for DIY enthusiasts. By following the step-by-step guide, you can prepare the deck surface area, choose the ideal stain, tidy as well as fix the deck, and apply the stain effectively. Do not forget the finishing touches and also upkeep tips to guarantee your deck stays gorgeous as well as shielded for several years to come. With these methods, you'll be able to delight in a sensational deck that improves the general appearance of your outdoor space. Happy staining!